 |
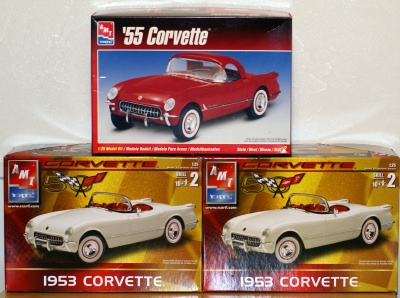
The 'Vette
triple play is based on the reissued versions of the kits. The only
significant difference between the 1:1 '53 and '54 Corvettes was color
availability. The '53 was offered only in Polo White with red interior.
That was expanded in '54 when Pennant Blue, Guardsman Red and Black
were also offered. So using two of the '53 kits, it's an easy task
to build both '53 and '54 versions, with the appropriate paint selection.
The '55 saw the addition of a V-8 engine, hence the '55 version of the kit. In 1955 available colors included Polo White, Pennant Blue, Corvette Copper, Gypsy Red and Harvest Gold.
Although these kits were well received when they were first issued,
and have enjoyed success in their reissued verisons, there are some
problems that have to be addressed. We'll discuss those as the project
progresses. |

The first thing I noticed that I didn't like was the separate taillight pieces. On the 1:1 vehicle, these were an integral part of the body. |

So I glued the pieces in place and then filled the gaps with sprue-glue filler. After a lot of sanding and shaping I got them like I wanted. |

The next problem that cropped up was the fit of the front and rear pans. In both instances they seemed just a little too wide. Again, on the 1:1 vehicle these were also part of the body, so I deviated from the kit instructions and glued them in place. That way I could not only fill the seams, but also reshape them to better fit the body. |

Notice that I've beveled the edges slightly on both the pans and the body to get them ready for a coating of body filler. I'm always looking for new and better ways to do things, so this seemed like a good time to try out a couple of different kinds of body filler. |

On the '53 I decided to use the old sprue-glue filler I had been using for a number of years. |

Here's the rear pan, filled and ready for sanding. |

On the '54 I used Bondo Glazing & Spot Putty® from my local discount house. It was inexpensive, only about three bucks for the tube. It may have been because it was a new tube, but when I first opened it, the putty seemed very thin. |

Here's the rear pan on the '54 with the first coat of the Bondo. Because of the thinness of the filler, more than one coat was required to fill the seam completely. |

Bondo applied to the front pan of the '54. |

I used 3M Acryl-Green Spot Putty on the '55. It was much more expensive, $20 at a local auto aupply store. But the size of the tube was much larger than the Bondo. Almost a lifetime modeling supply... |

The 3M putty was much thicker, and I liked the way it went on much better. |

Here's the rear pan of the '55, filled and ready for sanding. |

The sprue-glue filler on the '53 cured and sanded. Of the three fillers, the sprue-glue had the least amount of shrinkage. It was also the hardest of the three to sand. |

Here's the rear pan of the '53 after the first sanding and shaping. |

Here's the '54 after the first sanding and shaping. |

As mentioned earlier, a second coat of filler was required to fill the seam completely. The Bondo sanded easily and quickly. |

Initial sanding and shaping finished on the '55. |

The 3M filler sanded easily, but there was some shrinkage that required another coat. |

Meanwhile, I proceeded with construction of some of the sub-assemblies, starting with the chassis. Here's the kit hubcap. |

My research showed that there was red detailing on the 1:1 hubcap. I started by applying a coat of red to that area. |

While the paint was still wet, I used a paper towel to wipe away the excess, which left red in the recessed ribbed area. |

The finished wheel and tire assembly. |

The kit was engineered with separate front suspension components, but was not designed to be built with poseable front wheels. Since all the necessary parts were there,I decided to rectify that. |

Step one was to use a small hand-held drill to carefully drill holes in the ends of the tie rod. |

Next I drilled holes in the kingpin brackets. |

Look carefully and you'll see the holes in the ends of the brackets. |

I had originally planned to attach the tie rod to the kingpins using common household pins. However, the assembly was too delicate and I wasn't able to bend the pins to secure them in place without damaging the brackets. |

Back to the drawing board! I ordered some tiny 00-90 nuts and bolts from Micro-Mark. |

When they arrived, I found that the bolts were just slightly too large for the width of the kingpin brackets. I had some strip styrene on hand... |

...so first I drilled holes in the end of a strip. |

Then I cut the strip to the proper length. This shows the new bracket on the left as compared with the old one on the right. |

Here are the replacement brackets installed on the kingpins. |

This shows the bolts installed on the ends of the tie rod. |

Finally, the tie rod was attached to the kingpins with the bolts and nuts. The process was a bit tedious, but worth the effort. |

A view of the reverse side of the assembly showing the bolts in place. |

The completed chassis assembly. I repeated these steps for all three versions. |

Next I moved on the interior assemblies. The kit's shifter was pretty "clunky" looking... |

...so I found some dressmaker pins at my local discount store that had heads with the right shape. I bent them to the correct shape. |

This shows the replacement shifter installed. |

The completed interior assemblies, red for the '53, tan for the '54, and yellow for the '55. |

Here are the painted bodies; Polo White for the '53, Pennant Blue for the '54 and Harvest Gold for the '55. |

And the completed chassis assemblies. |

I was ready to mount the body to the chassis assembly and did a test fit, only to discover that the stance was way off. The body sat too high in the rear, and even higher in the front. At this point I was really frustrated and was tempted to just toss everything. But I decided to back away and come back to the project at a later time. |

Ready to get back to it. I was amazed to realize that almost eleven years have passed since I last worked on the Corvettes. They've been packed away for a long time. At first I thought that the problem in front was because of the inner fenders, which looked too high to allow the body to drop down where it whould. |

So I removed them and the radiator assembly. |

But even with those components removed there were still problems. The body still didn't drop down enough, and I realized that the wheels extended out too much. |

Both the front and rear tracks are much too wide. Also, notice how the front wheels are splayed apart due to the length of the tie rod. |
|
| |
|